


Views: 0 Author: Site Editor Publish Time: 2025-06-12 Origin: Site


Die casting is key to creating strong, detailed components.Many industries use it—automotive, electronics, aerospace.In this post, you'll learn each step of the die casting process.We'll explain what happens and why it matters for quality.
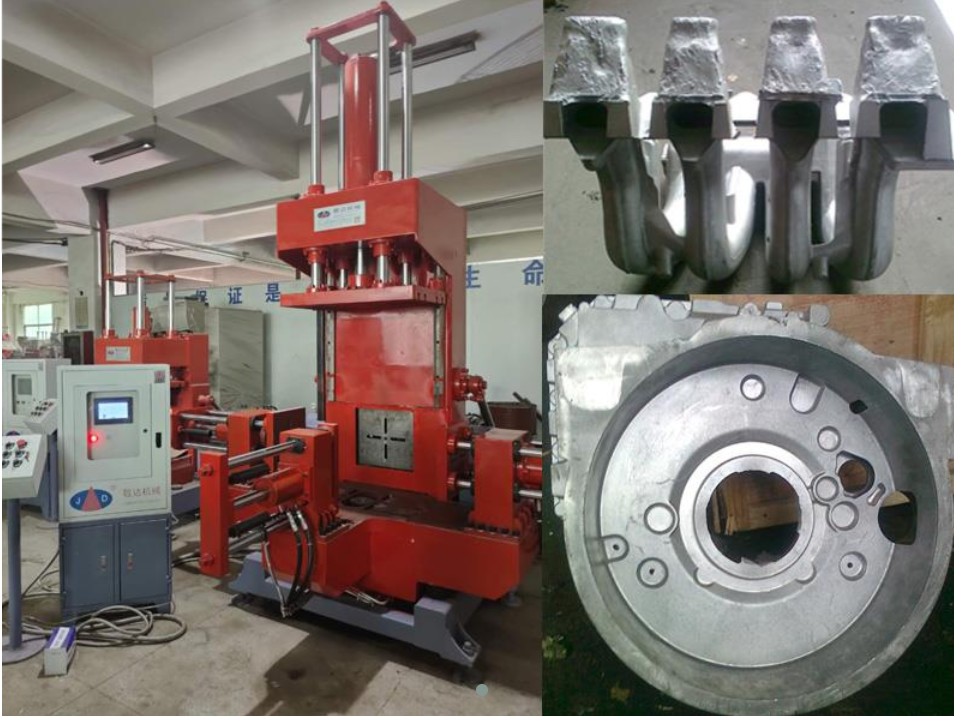
Die casting is a method used to produce metal parts by forcing molten metal into a mold cavity under pressure.The molds—called dies—are usually made of steel and designed for high precision and repeat use.This process is popular in industries that need complex shapes, like automotive, aerospace, and electronics.
| Feature | Die Casting Characteristic |
|---|---|
| Pressure Applied | High or low, depending on method |
| Mold Type | Steel dies for multiple use |
| Output | Consistent, complex metal parts |
High Pressure Die Casting (HPDC)
Molten metal is injected at very high speed and pressure into the die cavity.It's best for large production runs where dimensional accuracy and speed matter.Used mostly for aluminum, zinc, and magnesium parts.
Low Pressure Die Casting (LPDC)
Molten metal rises slowly into the mold using controlled gas pressure from below.It’s slower but offers better material density and is good for structural components.Often used for thicker aluminum castings, such as wheels or suspension parts.
| Method | Injection Type | Speed | Best For |
|---|---|---|---|
| HPDC | Fast & forceful | Very fast | High-volume, precise components |
| LPDC | Gradual lift | Slower | Thicker, high-strength parts |
Aluminum is lightweight, strong, and corrosion-resistant.
It melts at lower temperatures, reducing energy costs.
Zinc is ideal for parts needing tight tolerances and good surface finish.
Magnesium offers excellent strength-to-weight ratio for lightweight applications.
| Metal | Benefit | Common Use |
|---|---|---|
| Aluminum | Lightweight, corrosion-resistant | Automotive, electronics housings |
| Zinc | High precision, good finish | Small gears, consumer parts |
| Magnesium | Ultra-light, strong | Aerospace, portable electronics |
Start by heating the die evenly. This prevents sudden thermal shock.
Apply a release agent. It keeps the part from sticking inside the mold.
Check alignment between mold halves. Clean off any debris before cycling.
Melt your alloy—aluminum, zinc, or magnesium—in a controlled furnace.
Monitor temperature constantly. Even a small shift can affect the casting.
You can use electric, gas, or crucible-type furnaces depending on volume.
| Furnace Type | Features | Best For |
|---|---|---|
| Electric | Clean, precise temperature control | Small-to-mid runs |
| Gas | Fast heating, economical | Large-scale foundries |
| Crucible | Portable and flexible | Lower-volume shops |
Inject molten metal into the die quickly and forcefully.
HPDC uses high pressure. Choose between cold chamber and hot chamber setups.
Adjust pressure and flow speed based on part complexity.
| Chamber Type | Best For | Notes |
|---|---|---|
| Cold Chamber | Aluminum, magnesium | External ladle, slower injection |
| Hot Chamber | Zinc, low-melting alloys | Metal held inside injection system |
Keep pressure steady as the metal fills every cavity.Hold it until the surface solidifies. This reduces gas bubbles and voids.The part stays in the mold for a few seconds to cool and harden.Cycle time varies—complex parts or thick walls take longer.
Once solidified, open the die halves. It may be automatic or manual.Ejector pins push the part out gently.If ejection force is too high, it may bend or crack the part.
Clean off any stuck material before the next shot.
Trim away gates, runners, and excess flash from the part.Manual trimming uses grinders and cutters. Automation uses trim dies or robotic arms.Trimming improves appearance and allows proper assembly later.
| Trimming Method | Tools Used | Ideal For |
|---|---|---|
| Manual | Grinders, snips | Low-volume or custom |
| Automated | Trim dies, robots | High-speed production |
Once the casting is trimmed, surface finishing enhances appearance and durability.Deburring removes sharp edges left after trimming. It makes parts safer to handle.Shot blasting cleans the surface using small metal beads. It improves texture and removes scale.Painting and powder coating add color and improve corrosion resistance.Anodizing, often used on aluminum, creates a tough oxide layer for added protection and aesthetics.
| Finishing Method | Main Benefit | Common Use |
|---|---|---|
| Deburring | Smooths edges | Safety and handling |
| Shot Blasting | Cleans surface, adds texture | Prepares for coating |
| Painting | Adds color, protects surface | Consumer-facing parts |
| Anodizing | Corrosion resistance | Aerospace, electronics |
Not all die cast parts need heat treatment, but some do.It's mostly used for structural alloys like A360 or A380.Heat treatment improves strength, ductility, and fatigue resistance by changing the metal's microstructure.Processes like T5 and T6 aging are used, depending on alloy type and required strength.You’ll see this in automotive, aerospace, and load-bearing applications.
Casting can’t do everything. That’s where machining steps in.
Sometimes, you need tapped holes, flat faces, or precision slots.
CNC machines add these details with tight tolerances.
Operations include:
Drilling
Tapping
Milling
Turning
| Operation | What It Does | When It's Needed |
|---|---|---|
| Drilling | Adds holes | Mounting or fluid channels |
| Tapping | Adds threads | Bolt or screw connection |
| Milling | Flattens or cuts shapes | Mating surfaces or contours |
| CNC Turning | Shapes round parts | Rotating shafts or bushings |
Maintaining die casting quality starts during production, not just after.
Operators use real-time monitoring to track critical variables.
Temperature must stay within a narrow range for proper metal flow.
Injection speed and pressure affect part fill, surface finish, and porosity.
Digital sensors capture this data constantly during each cycle.
Smart machines adjust settings automatically if anything drifts out of range.
| Parameter | Why It Matters |
|---|---|
| Melt Temperature | Affects flow, fill, and strength |
| Injection Speed | Influences surface and porosity |
| Holding Pressure | Helps reduce shrinkage voids |
After casting, quality checks confirm that the part meets specifications.
Visual inspection identifies obvious issues like flash or misruns.
Dimensional checks use calipers or CMMs (Coordinate Measuring Machines).
These tools measure features down to ±0.01 mm, ensuring tight tolerances.
For internal defects, X-ray and CT scanning detect porosity or voids.
Leak testing is vital for components like pump housings or engine blocks.
It checks whether the part can hold pressure without fluid loss.
| Inspection Method | What It Detects |
|---|---|
| Visual Check | Surface defects, flash, misalignment |
| CMM | Exact size and shape accuracy |
| X-ray/CT Scan | Internal voids or porosity |
| Leak Testing | Sealing integrity under pressure |
Here’s a clear breakdown of each step in the die casting cycle. From mold prep to final trimming, each stage matters for quality and speed.
| Step | Description | Purpose |
|---|---|---|
| Die Preparation | Heat the die, apply release agent, align it | Protect the mold and help parts eject cleanly |
| Metal Melting | Bring alloy to correct temperature | Ensure it flows smoothly into all mold areas |
| Injection | Inject molten metal under high pressure | Accurately fill detailed and thin-wall cavities |
| Solidification | Cool the metal while holding pressure | Strengthen the part and reduce air pockets |
| Die Opening & Ejection | Open die and push part out with ejector pins | Reset the mold for the next casting cycle |
| Trimming | Cut off excess metal and flash | Improve part’s appearance and functionality |
Each of these steps must work together for successful production. The process is fast, but it demands precision at every point.
High-pressure die casting (HPDC) runs fast—often 30 to 60 seconds per shot.
Low-pressure die casting (LPDC) takes longer—2 to 5 minutes per part.
That’s because LPDC fills more slowly and cools naturally.
Here’s a quick comparison:
| Process Type | Avg. Cycle Time | Common Use Cases |
|---|---|---|
| HPDC | 30–60 seconds | Automotive, electronics |
| LPDC | 2–5 minutes | Wheels, structural castings |
Several things can slow down—or speed up—a die casting cycle:
Die cooling system: Efficient cooling reduces solidification time.
Part complexity: Thin-walled, simple parts cool and eject faster.
Alloy type: Zinc cools quicker than aluminum or magnesium.
More metal? More cooling time. Sharp corners or thick sections? Slower ejection.
| Factor | Impact on Speed |
|---|---|
| Cooling channels | Faster solidification |
| Alloy choice | Varies melt/cool timing |
| Part geometry | Influences fill/eject |
Robotic systems boost speed, accuracy, and consistency.
They handle:
Spraying release agent
Inserting cores or pins
Trimming and part removal
Real-time process monitoring
Automation also reduces human error and machine downtime.
That means faster cycles, better part quality, and lower scrap rates.
When you understand how die casting works, you design smarter parts.
Use generous draft angles. Avoid deep undercuts and sharp corners.
Design parts that flow well with molten metal and are easy to eject.
This lowers tool wear, speeds up production, and reduces defects.
| Design Tip | Benefit |
|---|---|
| Add draft to vertical walls | Eases ejection, reduces drag |
| Avoid thin walls <1.5 mm | Improves fill and strength |
| Round sharp edges | Reduces stress and cracking |
Knowing the full process helps spot weak links in production.
You can optimize cooling time or injection pressure to cut cycle time.
Reduce scrap by tweaking die temperature or melt flow.
This means more consistent output—and lower costs per part.
Key metrics to track:
Cycle time per shot
Defect rate per batch
Tool wear frequency
When you know the steps, you ask the right questions.Is the supplier using cold chamber or hot chamber?Do they trim manually or with robots?How do they inspect castings for porosity?Understanding the process helps you compare quotes better and ensure quality.
| Question to Ask Supplier | Why It Matters |
|---|---|
| What's your average scrap rate? | Indicates process consistency |
| What alloys do you use? | Affects part strength and cost |
| Do you use NDT inspection? | Confirms part integrity assurance |
Die casting includes six main steps from die prep to trimming.Each step affects part quality, strength, and finish.Strong process control and testing ensure better results.Match each step to your product's performance needs.
A: Die preparation—preheating the mold, applying release agent, and checking alignment.
A: Each cycle usually lasts 30 to 60 seconds, depending on size and cooling time.
A: It’s trimmed to remove excess metal, then may be machined or surface finished.


